Tutorials
Learn new skills with our bite sized lessons
Resources
Requirements
3DS Max 2010, RailClone Pro 2.x
Featured Products
Get Products
Introduction
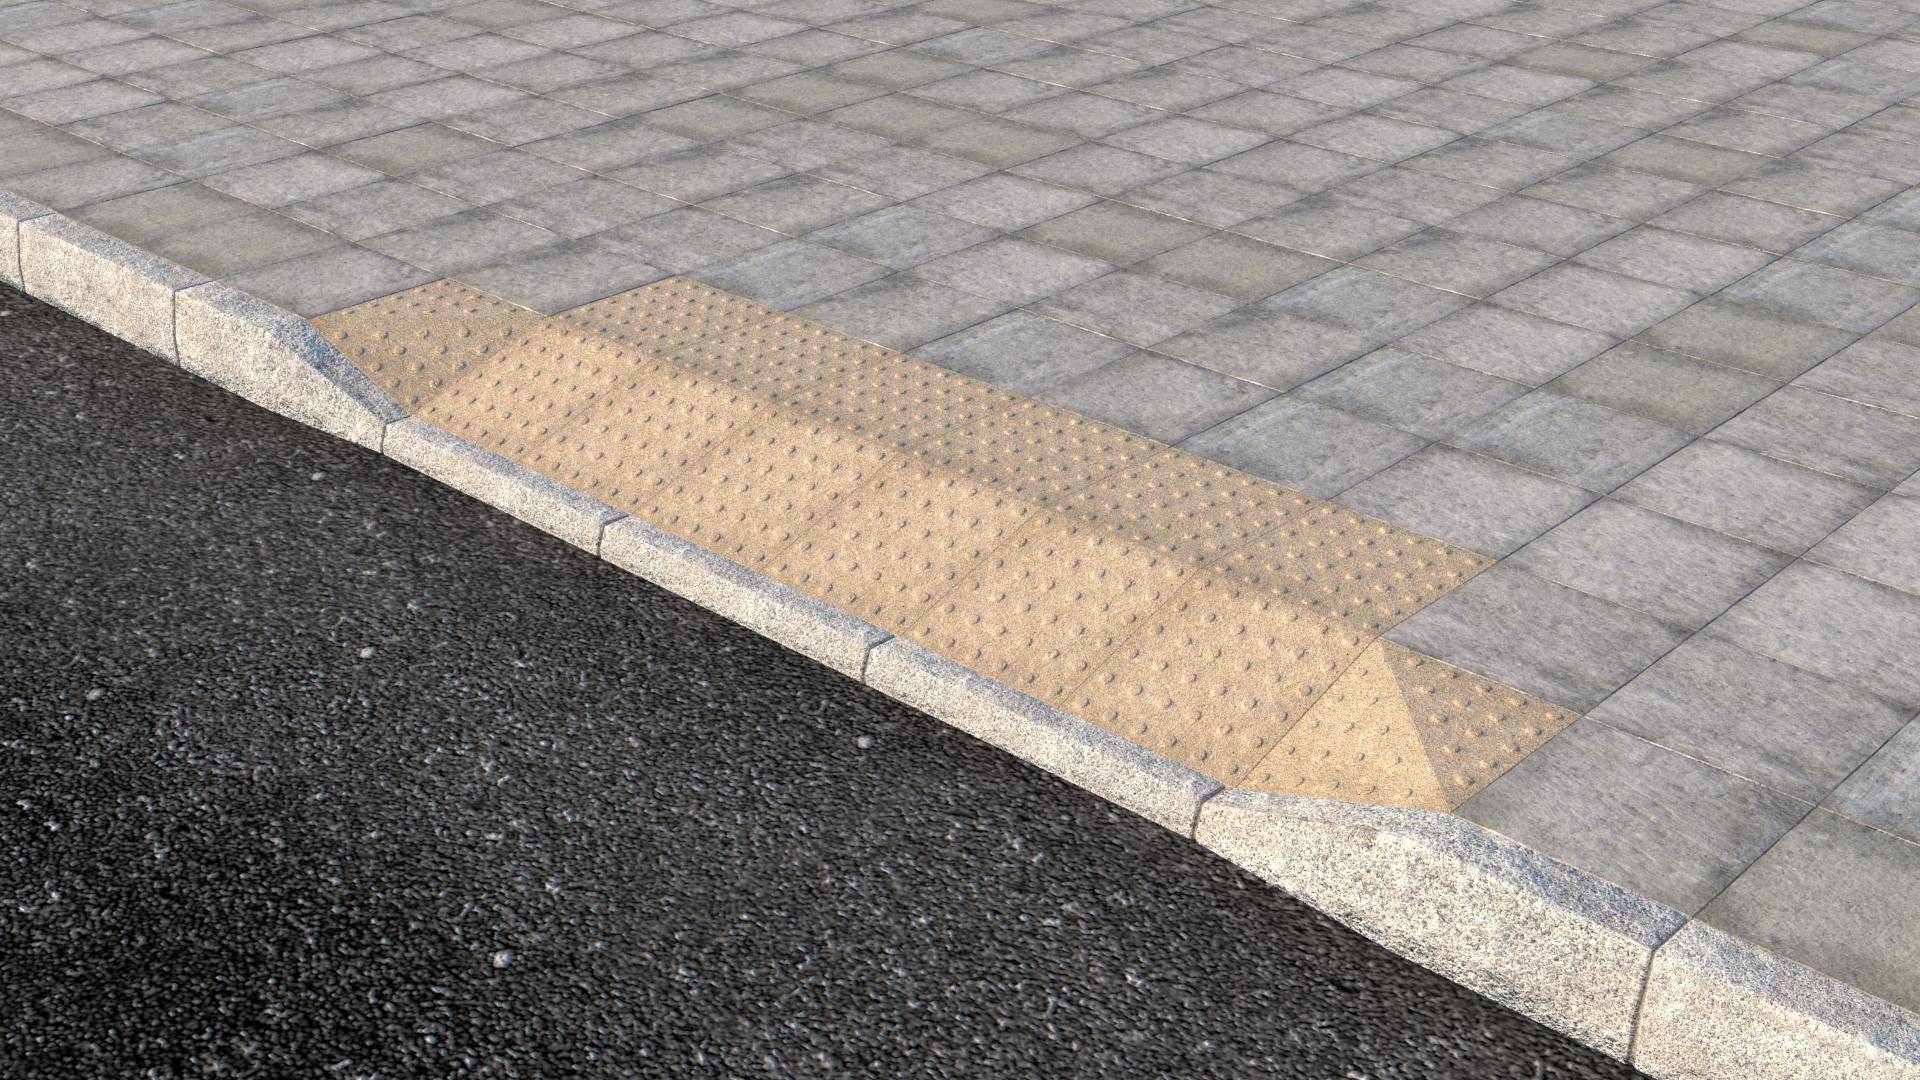
In this quick tip tutorial for RailClone 2, we’re going to look at how you can apply specific generators, or styles, to different segments of the same base spline according to their material ID. We’ll create a pavement style that adds a drop kerb to any spline segment with a material value equal to 2. In creating these styles, we’ll also be covering the combine, sequence, and reverse nodes.

The scene already has some splines and a road from the library in place. There are 5 small slices of pavement used to create a new style. Though this example demonstrates the creation of a Kerb and pavement in a single style, the same principles could be used to create them separately for a more flexible approach and easier re-use.
To get started it’s helpful to think of the two parts of the pavement (normal and drop) separately even though we’re creating them as part of the same style. There’s an existing RC object in the scene we can use to get going.
Step 1: Create the full height pavement

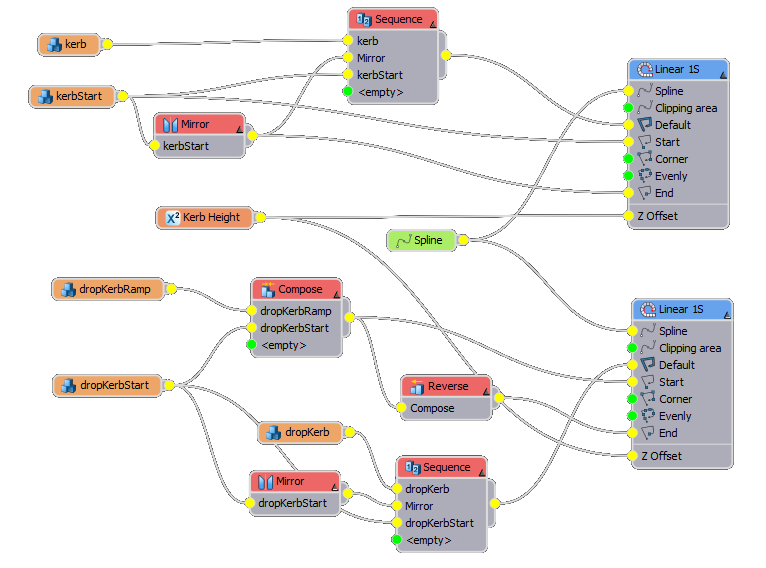
- This generator requires only two segments, a start and and a middle section. Using these we can create a kerb edge and govern the length of each stone. To get started select the existing RC object, open the style editor and add a new L1S generator to the construction view.
- Add a Spline object and pick “Line001″ from scene, connect this to the spline input of the generator.
- Add a new Segment object and pick the geometry called “Kerb” from the scene.
- Set Properties>General>Y alignment to bottom.
![Create a drop kerb-bottom-align.png]()
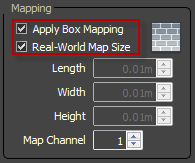
- From the Deform menu, turn onApply Box Mapping and Real-World Map Size.
![Create a drop kerb-mapping.png]()
- Attach this segment to the default input.
- Clone the Segment node using the Copy and Paste buttons, and assign the object called “kerbStart” from the scene. Attach this segment to the Start input.
- We now need a similar segment at the other end, to achieve this we’ll simply mirror “kerbStart” and attach it to the end input. Add a new Mirror operator, connect the segment to it’s input and wire to the End slot of the generator.
- To create some joints to define individual stones we can reuse the existing “kerbStart” geometry. Create a new Sequence node and wire the existing kerb Segment, then the Mirror operator finally the “kerbstart” segment to its inputs.
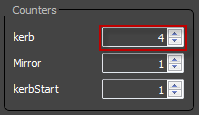
- Click on the sequence node and change the number of times the “kerb” segment is repeated to 4 to control the length of the stones.
![Create a drop kerb-kerbcounter.png]()
- Finally open the Material Editor and apply the kerb material to the RailClone object.
Step2: Create the drop kerb
To create the drop kerb use a very similar approach to the steps described above.
- Create a second L1S generator and attach the existing spline node.
- Copy and paste any segment node then Select “dropKerbRamp” from the scene.
- Create a new Compose operator and wire to the Start input of the generator. Wire the “dropKerbRamp” segment to the compose node.
- Clone the segment and select “dropKerbStart” from scene, wire this to the second input of the Compose node.
- We want a similar setup for the end of the style. We could have modelled mirrored geometry but in this case it’s simpler to use a Reverse operator to invert the order of a compose operation and optionally mirror the geometry. Add a new Reverse operator and attach the Compose node to its input. From the reverse node’s properties, turn on Mirror Segments on X then connect it to the Generator’s End input.
![Create a drop kerb-mirroronX.png]()
- To add the default drop Kerb section, clone any segment and allocate “dropKerb” from the scene. Wire to a new Sequence node then attach the sequence node to the default input.
- Add another Mirror operator and connect the “dropKerbStart” segment to the input. Wire the mirror’s output to the sequence node.
- Finally wire just the “dropKerbStart” segment to the final input of the sequence node. As described above, you can control the length of the stones by simply adjusting the number of times a segment repeats.
Step 3: Limit by Material ID
Now change the generators so that each only applies to one material ID.
- Click on the drop kerb generator, go to Properties>Limits and turn on Material ID, set the value to Equal 2.
![Create a drop kerb-limitbyID.png]()
- Do a similar thing for the full height kerb, turn on Material ID but this time ensure that the value is Equal 1, this should be the default settings.
Step 4: To use the style
- Select the base spline and go into the segment sub object mode.
- Select any segment and go to the Surface Properties rollout. Change the Material ID to 2. A drop kerb will appear on any segment with this ID.
Conclusion
In this tutorial we explored the use of Material IDs to selectively apply different generators. The pavement style also used a range of different composite operators to combine, sequence, mirror and reverse segments.


