Tutoriels
Des cours de qualité pour devenir un expert
Fichiers de ressources
Conditions
3DS Max 2010, RailClone Lite 2.x
Produits populaires
Obtenir des produits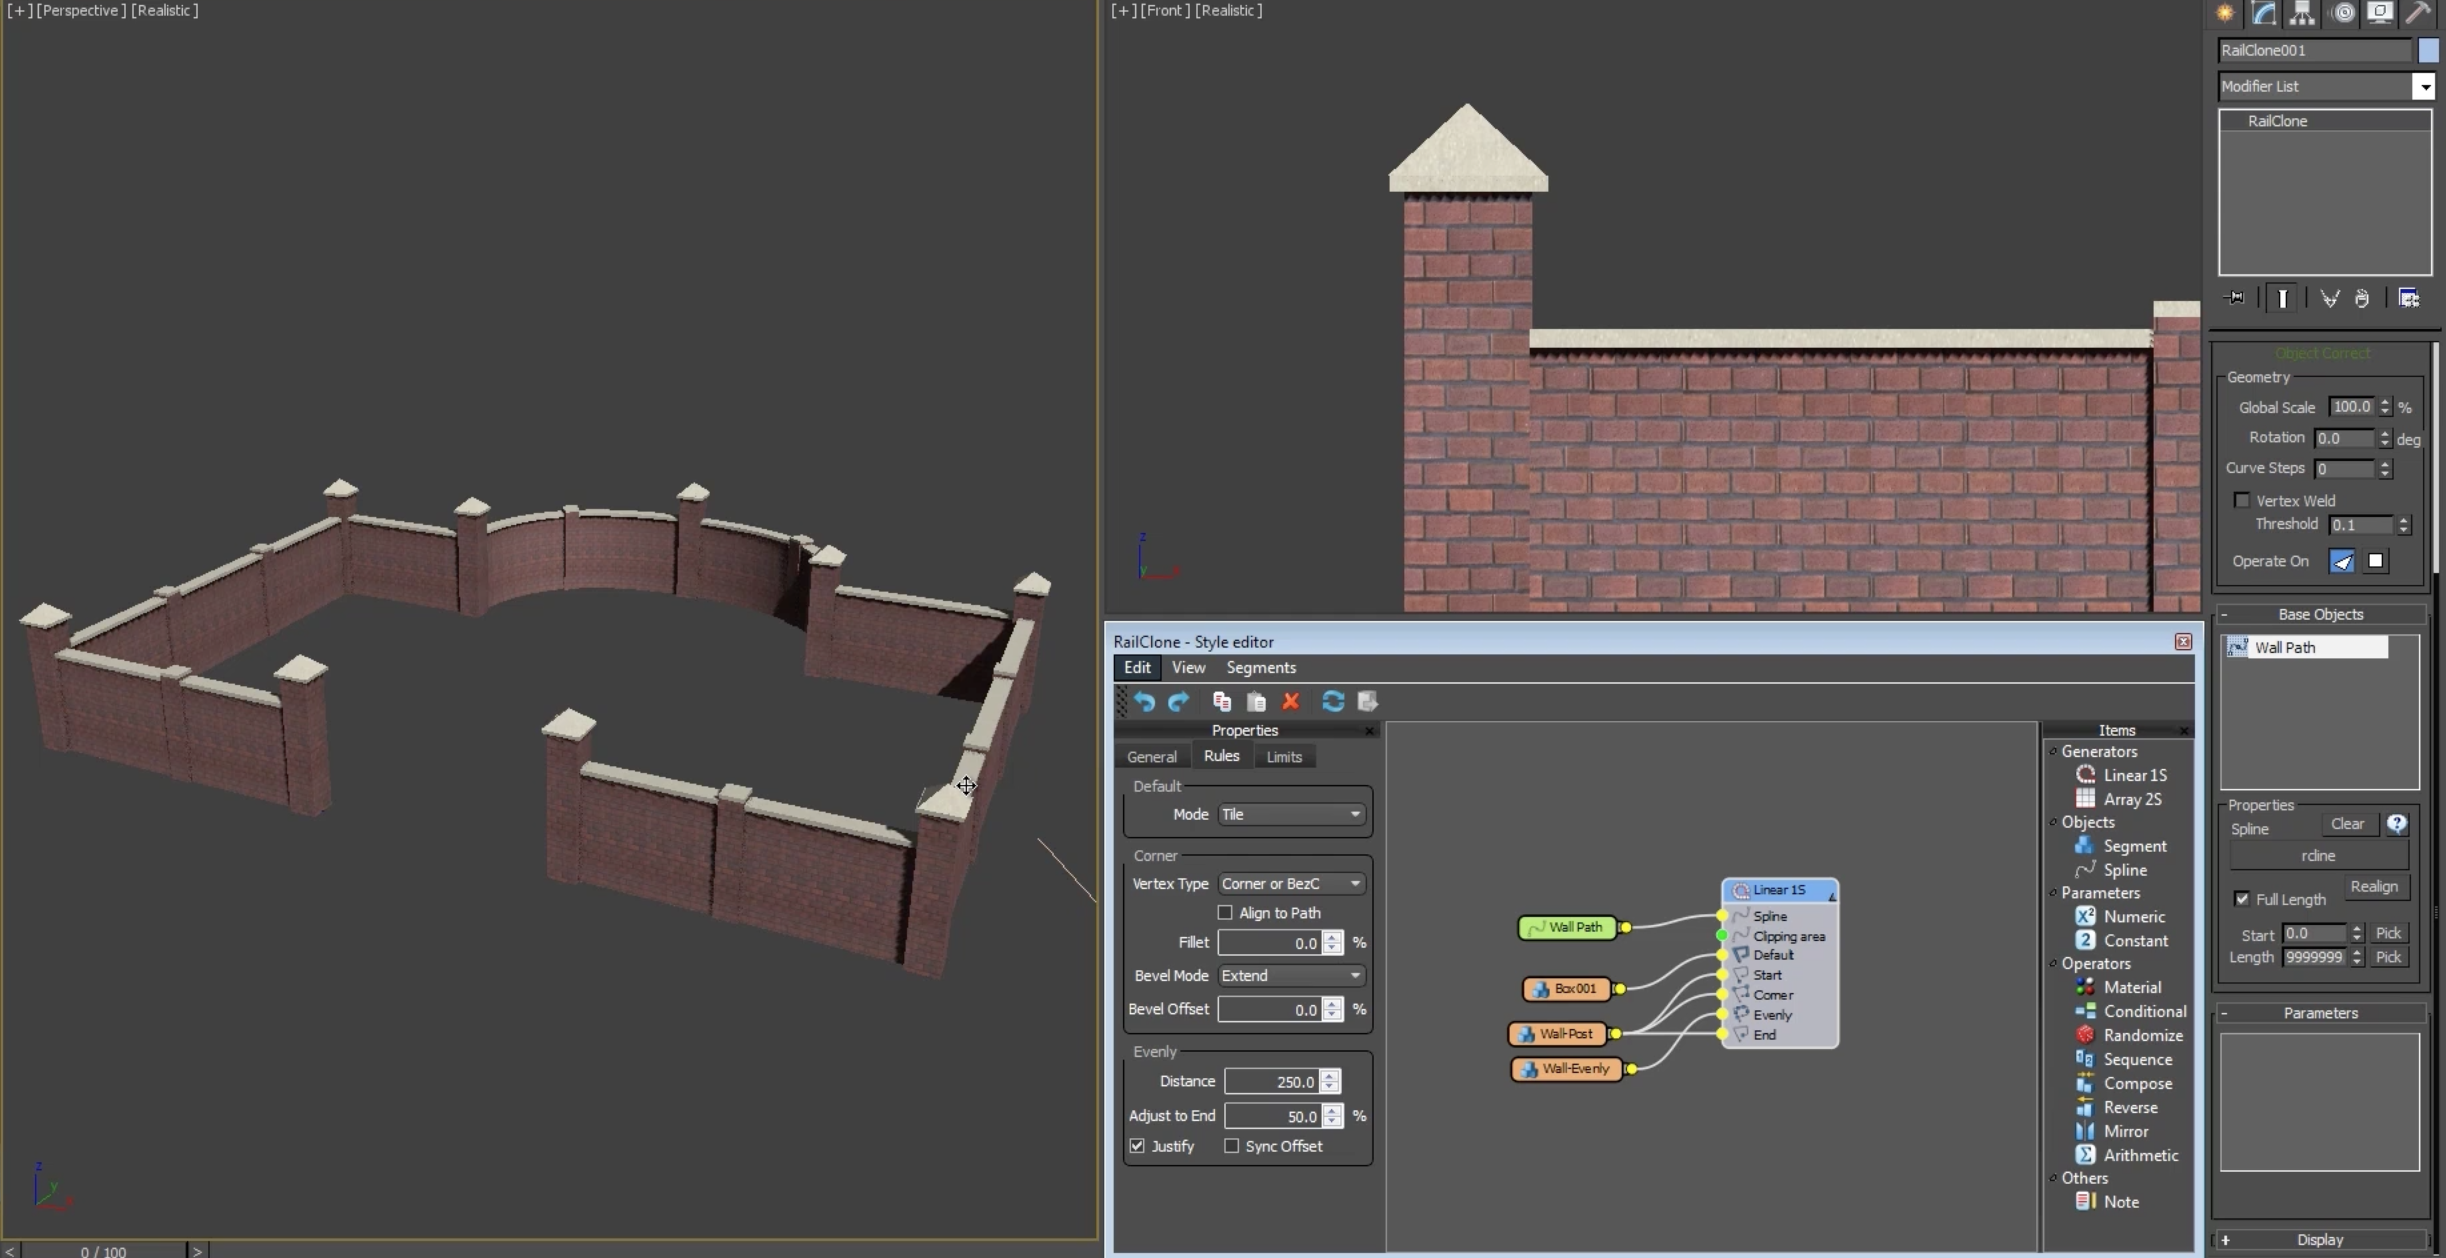
Introduction
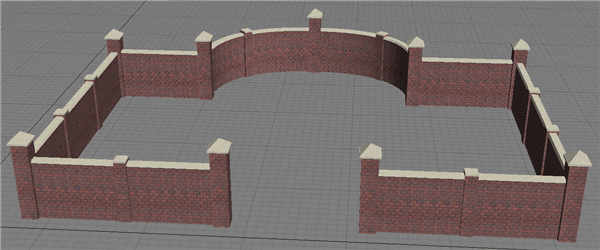
The Masonry Wall tutorial is intended for new users of RailClone, and provides a thorough introduction to some of the most commonly used features. By completing this exercise you will be able to use the built in library, understand the style editor, and easily create new styles.
This tutorial can be completed using RailClone Lite. See the differences between Lite and Pro versions.
Key Principles
Before getting started lets take a look at some key RailClone terminology. In the example below the plugin uses a spline from the scene to create the path for a 1 dimensional array, this is called a Base Object. To create the geometry, meshes called Segments are cloned and deformed along the Base Object according to a ruleset defined by a Generator. For maximum flexibility and ease of reuse, Segments can be combined, adjusted, sequenced, mirrored and more using Operators.
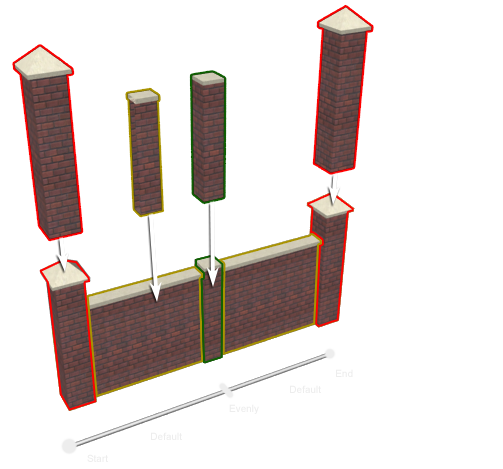
Before creating a new RailClone style let's look at how to use the extensive library that comes with the plugin.
Using the Library
RailClone comes with over 280 predefined styles allowing you to easily add common objects to your scenes. The built in styles include roads, curbs, sidewalks, railway lines, bridges, streetlights, ducting, trusses, curtain wall systems, theatre seating, railings, scaffold, walls and much much more.
Using these styles is simple, often requiring only the creation of a single spline to determine the path. Lets create one now.
Rollouts.
RailClone has 6 rollouts:
- About displays version number and license information
- General controls global settings like the Random Seed value and icon size as well as providing access to online help and updates
- Style provides all the tools for loading, saving, adjusting, creating, copying and pasting styles.
- Base Objects provides a list of inputs required for the current style and let's you allocate them from the scene
- Parameters contains adjustable values for any parametrised values used in the current style by wiring with a numeric parameter node.
- Display give you options for optimising viewport displays, using native shaders, and controlling segment and faces constraints.
The Library Browser
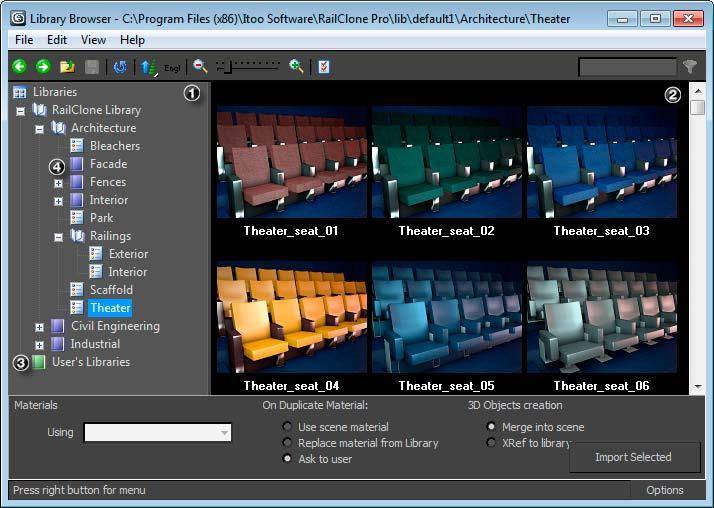
1. Directory Navigator. 2. Items Grid. 3. Built in Library. 4. User Customisable Library
The Library browser allow you to save, share and load predefined styles. The window is split into two panes. On the left is a Directory Navigator that allows you to navigate the current style libraries. Built in libraries are represented by a blue folder and cannot be changed, editable user Libraries are green.
The larger pane on the right is the Items Grid that previews the styles in the library currently selected from the Directory Navigator.
To load a style from the library into the scene, simply Double Click on its preview, click Import Selected or Right Click and select Use Item(s)
- Create a new spline in the top or perspective viewport. This will become the Base Object that defines the path use to create geometry
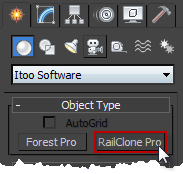
- Go to the Create Panel>Geometry>Itoo Software and click RailClone. Drag out a new RailClone object in the perspective viewport. The size of the RC icon has no effect on the final geometry.
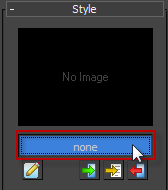
- With the new RailClone object selected, go to the Modify panel and open the Style rollout. Click on the Open RailClone Library Browser button, this will currently say "none" but will display the name of the style once loaded.
![Building a masonry wall-rc_tut_wall_open_library.png]()
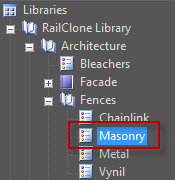
- With the Library open, use the Directory Navigator to open the Masonry Library. Go to Libraries>RailClone Library>Fences>Masonry
![Building a masonry wall-rc_tut_wall_Library_directory.png]()
- From the Items Grid double click on the "Brick Fence 1" style to import it into the RailClone object.
- In the Style rollout you will see the style's name and a preview image.
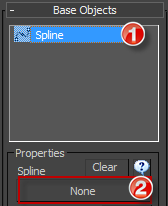
- When a style is loaded, nothing will display until you select a new path from the scene. To do this go to the Base Objects rollout, here you will find a list of the inputs required for the loaded style to work. Select the "Spline" item from the list, click on the Spline Object Picker and select the spline created in step 1.
![Building a masonry wall-rc_tut_wall_pick_base_objects.png]()
A new brick wall will now be created in the viewport. The wall is linked to the Base object, if you edit the source spline the RailClone object automatically updates. If the path is curved, the wall will bend to follow; if it's lengthened, additional segments will be added: if a vertex is added, a new pillar will be created. In the next section we'll take a brief tour of the Style Editor and look at how this object has been constructed.
The Style Editor
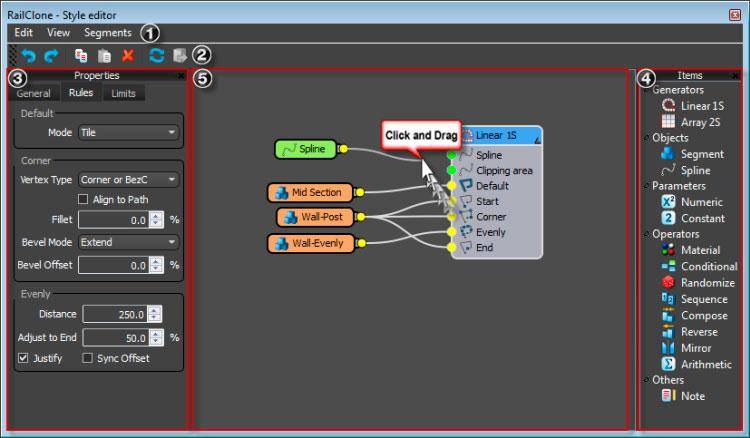
The Style Editor interface: 1. Menu Bar, 2. Tool Bar, 3. Properties Editor, 4. Items Panel, 5. The Construction View
The Style Editor features an easy to understand node based view, with an interface split into 3 panes. On the right is the Items List, this shows all of the Generators, Objects, Parameters, and Operators that can be combined to construct a Style. In the centre is the Construction View, nodes are created by dragging them from the items list to this area. To wire nodes together, simply click and drag between their respective input and output slots. On the left hand side is the Properties Editor, clicking on a node in the construction view shows its editable parameters in this window.
The style editor is used to construct the relationships between Base Objects, Segments, Operators, and Generators that define how a RailClone object is constructed. To examine the style ruleset used in the wall we just created, go to the Style rollout and click on the Open Style Editor button ( ).
).
In the centre we see only 4 nodes: one spline that is being used to determine the path; two Segments, one each for the wall and the pillar; and a generator that is determining the position of the segments along the path. Thin lines or Wires join the nodes together and define their relationship. From glancing at this arrangement it's easy to understand that a post is being created at the beginning and end of the path, the corner slot means that a post will also be created on a Vertex, while Evenly creates one at regular intervals along the splines length. A Segment in the default slot will be created where no other rules apply, in this case it is the standard wall section, created between the pillars.
Now we know the theory, we'll create a new brick wall style from scratch.
Creating a New Style
Before you get started, please download the exercise files from here. These contain simple geometry objects used to construct a parametric wall, driven by a single spline.
- Open "wall.max". This file contains 3 objects we can use to create the wall.
- Create a new straight Spline in a perspective or top view. This will become the Base Object that defines the path for our new Style.
- Go to the Create Panel>Geometry>Itoo Software and click RailClone. Drag out a new RailClone object in the perspective viewport.
![Building a masonry wall-rc_tut_wall_newRailclone.png]()
- From the Modify panel, go to the Style rollout and click the Open Style Editor button (
![Building a masonry wall-rc_button_editstyle.png]() )
) - Create a new L1S Generator by dragging it from the Items List to the Construction View.
One dimensional arrays need at least a generator, a spline and a segment to function. We'll add those now.
![Building a masonry wall-rc_tut_wall_newL1s.gif]()
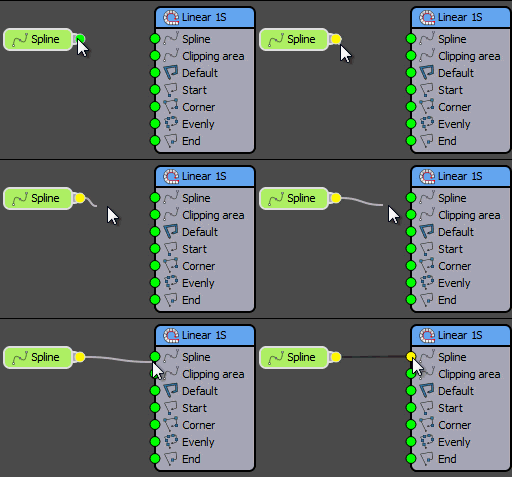
- Create a new Spline object by dragging it from the Items List to the Construction View. Select the spline node and from the Properties Editor, rename the spline "Wall Path". Wire the Spline node's output slot to the Generators Spline input by clicking and dragging between them with the mouse.
![Building a masonry wall-rc_tut_wall_linknodes.gif]()
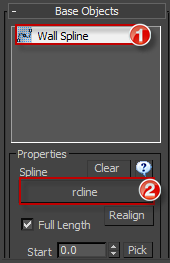
- Assign the spline by going to the Base Objects rollout, Select "Wall Path" from the list click the Assign Spline button and pick the spline we created in step 2 above.
![Building a masonry wall-rc_tut_wall_pick_spline.png]()
- Now the path has been assigned we need to pick the geometry to clone along it. Create a new Segment Object by dragging it from the Items list to the Construction view.
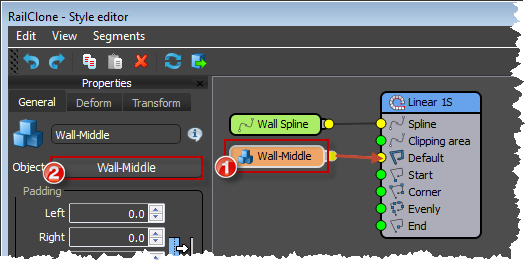
- Select the Segment node, go the Properties editor and click on the Object Picker button. Select the mesh called "Wall-middle" from the scene
![Building a masonry wall-rc_tut_wall_assign_segment.png]()
- Wire the Segment's output to the generator's Default input. The wall will be generated, cloning and adapting the mesh along the path.
- By default, the RailClone object does not have any material assigned. Open the Material Editor and assign the "wall" material to it from the Scene Materials.
- To create a more complex style we'll add brick piers at the start and end points of the path. To do this, in the Style Editor create a new segment and pick the "Wall-Post" object from the scene.
- Wire the Output slot of this segment to both the Start and End inputs on the Generator.
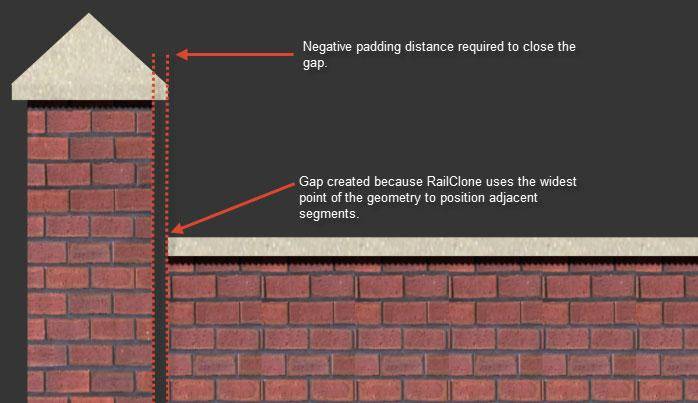
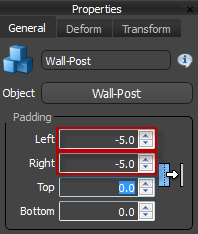
- The wall will now have a post at either end, but if you zoom in on the joint between the post and the wall you will notice that there is a small gap. This is because by default the bounding box RailClone uses to calculate the position of adjacent segments is based on the widest point of the geometry, and this includes the top piece of the post. To fix this issue, we will add a negative padding value to both sides of the post segment (see Padding reference for details).
![Building a masonry wall-rc_tut_wall_padding.jpg]()
- In the Style Editor access the post Segment's properties. From the General tab you will see padding for each side of the object. Set Left and Right padding values to -5 to close the gap.
![Building a masonry wall-rc_tut_padding2.png]()
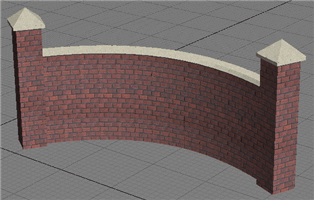
- Now you can experiment with the spline, moving or adding vertices. Being a parametric object, RailClone will rebuild the wall automatically, even bending Segments to follow curved paths.
![Building a masonry wall-t10.gif]()
- When you're ready, unhide all objects from the scene. You will find a spline ("rcline"), and a "Wall-Evenly" mesh object that which will be used in the next part of the tutorial.
- To allocate the new spline to the existing object, go to Base Objects, select "Wall Path" from the list and assign "rcline" as a path using the pick spline button.
- For this wall, we will add posts on the corners of the spline. In the style editor, wire the "Wall-Post" segments output to the Generator's Corner input. To stop the posts from rotating to follow the direction of the path go to the Generator's Properties, open second tab marked Rules and turn off Align to Path in the Corners section. By Default RailClone applies this rule to all the spline's vertices of the "Corner" or "Bezier-Corner" type, though this can be easily changed by selecting others from the Vertex Type drop-down menu.
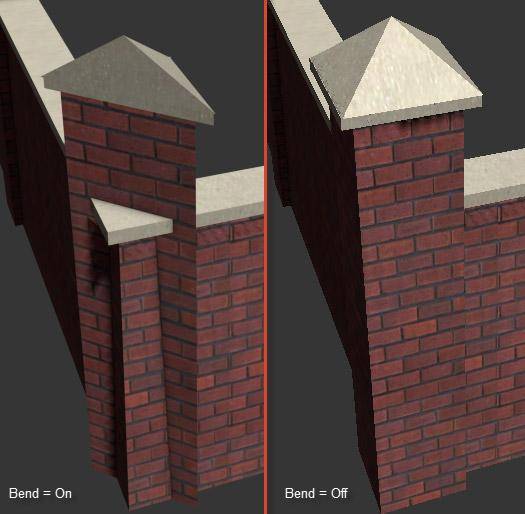
- If you look at the result you'll notice a problem. The plugin tries to adapt the mesh in the corners, bending the segments and creating an undesirable result.
To fix this issue go to the "Wall-Post" Properties>Deform and untick "Bend". There are multiple parameters that you can modify for each segment, from slicing to the behaviour on sloped paths. See the Segments reference for details and common procedures.
![Building a masonry wall-rc_tut_wall_bend.jpg]()
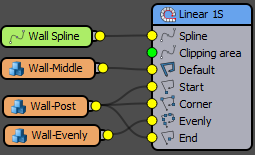
- Finally, we'll add some smaller posts evenly spaced along the wall. Create a new Segment object and pick "Wall-Evenly" from the scene. Wire this node to the Evenly input of the generator.
![Building a masonry wall-rc_tut_wall_complete_nodes.png]()
The completed node tree.
- To adjust the spacing, go to Generator>Properties>Rules>Evenly and set the distance to 250.
![Building a masonry wall-rc_tut_wall_evenly.png]()
- This completes the tutorial. Feel free to experiment by creating other splines, manipulating the existing or adjusting any of the parameters accessed when creating this tutorial
![Building a masonry wall-t15.gif]()
The completed style
Once you have completed this tutorial you should be able to create new RailClone objects, load styles from the library, and use the Style Editor, to create a new parametric object. For more information about every aspect of RailClones features please see our reference section or visit the tutorials page for more advanced videos.

