Tutoriales
Aprende nuevas habilidades con nuestras lecciones breves
Recursos
Requerimientos
3DS Max 2011, RailClone 2.x
Productos destacados
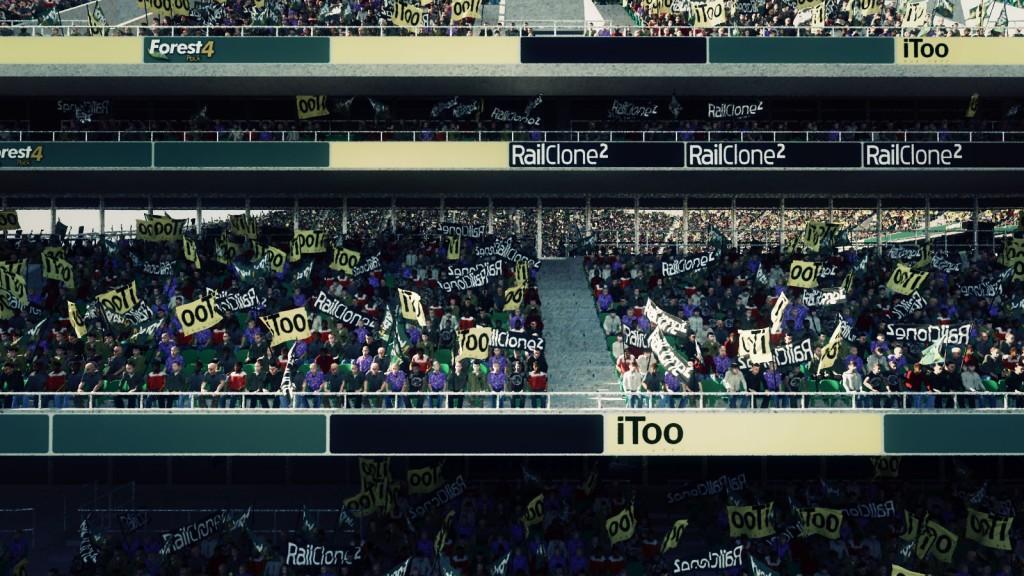
Obtener ProductosHaving created a seating style in the previous tutorial it's time to add a crowd. This video explores the many randomisation controls available in a RailClone style to help create varied audiences, with flags!
Note that to maintain compatibility with RailClone lite, this example uses only two audience models, RailClone Pro users can use an unlimited number of audience members making repetition harder to detect.
If you've completed the previous tutorials, you can continue with your scene. If you'd rather start with this tutorial, you can download the current scene files from here or from the links on the left hand side of this page.
To create the audience.
- Create a new RailClone object in any viewport, rename it "RC_audience" and open the style editor.
- Add a new L1S generator and a Spline object. For testing purpose we'll use the spline called "Spline_small_temp" from the scene. This is a short spline used to build the style and maintain fast interactivity, once finished we can swap this for the correct spline from the scene.
- Add two new Segment objects and assign the two characters models from the scene to them.
- Add a Randomise operator and connect the two segments, wire this to the Evenly and Start input.
- To align the segments correctly, change Settings>Default>Alignment Y and Z to Pivot.
- To ensure that the spacing matches the chairs, change the X Alignment setting to Left.
- Change the generator's Properties>Rules>Evenly>Distance value to 0.43m to match the value set for the chairs.
- To prevent segments pushing each other out of alignment, change their Properties>General>Padding>Right value to -1.0m.
- Finally to position each person, adjust the Properties>Transform>X value so that they sit roughly in the middle of a seat.
Adding empty seats
By adding a segment with no geometry assigned to the randomise node, we are able to introduce occasional empty seats.
- Create a Segment node.
- Connect to a new input on the Randomize operator.
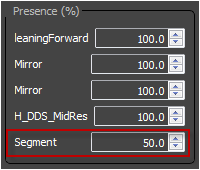
- Control the chance of an empty seat appearing by selecting the Randomize node and controlling each segment's Presence. There is no need to ensure the values add up to 100%, this is normalised automatically.
Randomising materials.
We now have an audience randomly selected from two source models, to add further variety it is possible to use the same techniques explored in the second part of this series - creating the billboard adverts - to randomly assign material IDs. There are 10 different character textures in a mult/sub object material for this style. To use them:
- Assign the "Audience" material to the RailClone object.
- Add a new material operator to the style and connect the randomise output to its input. Now wire the material node to the Start and Evenly inputs on the generator.
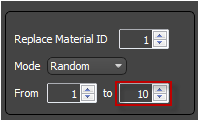
- From the Material node's properties, change the From value to 10.
Controlling by a spline's material ID
Finally, to ensure that the audience only appears on the splines with and ID of 1, turn on the generator's Properties>Limits>Material ID parameter and leave it at the default settings. (See the Drop Kerb tutorial for more details of this technique).
Adding flags
Even with effectively randomised geometry and materials, avoiding visible repetition completely is very difficult. We'll add some flags to help break up the repeating patterns of the audience.
- Create a new RailClone object and rename it "RC_flags".
- Create a new L1S Array and a spline object. Assign "Spline_Small_Temp" to the spline node and wire it to the spline input of the generator.
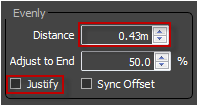
- Change the generator's Evenly Distance to 0.43m to match the audience and the chairs. Turn off Justify.
- Turn on Limits>Material ID as described above.
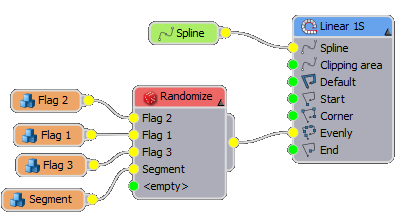
- Create a new Segment object and assign one of the 3 flags from the scene.
- Create a new Randomise operator and connect the segment to the first input. Connect the randomise node to the generator's Evenly input.
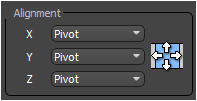
- Change the Properties>Alignment> X Y Z values to Pivot and change the Padding Right value to -4m to prevent adjacent segments from interrupting the regular spacing.
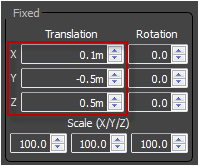
- Now use the Properties>Transform>Translation> X Y Z values to position the flag approximately in the audiences' hands. These models have not been designed to hold flags, so an estimate of what will look correct is fine. X: 0.1m, y:-0.5m, Z:0.5m is a good starting point.
- To randomise the rotation of the flags, go to Properties>Transform>Random and turn on Rotation. Set the values as follows: X Min: -15, X Max: 15; Y Min: 0, Y Max:30; Z Min: -180, Z Max:180.
- Now we have one segment set up, we can reuse it for the other two flags. Right click on the Segment and click Copy, the right click and select Paste twice to create two more segments.
- Assign the two remaining flags in the scene to the new segments and connect them to the Randomize operator.
- We now have a flag on every seat, to thin them out add a new empty Segment wired to the Randomize node.
- Go to the Randomize node's properties and set the empty segment's presence to 2000%.
Applying the new styles to the stadium.
In the steps above a short spline was used to help visualise the styles for easier creation. Now that they are complete it's time to apply them to the correct splines in the stadium
- For each RailClone object, go to the Base Objects rollout and reassign the existing path to "Spline_Chairs".
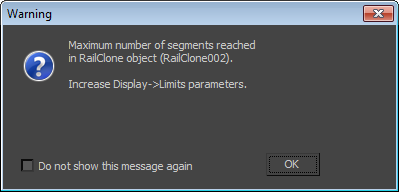
- If you get an error message reporting the maximum number of segments has been reached, go the Display rollout and increase the Segments value. 60,000 should be adequate for the audience and flags.
Conclusion
In this video we looked at RailClone's tools for randomising geometry, textures and transforms to create an audience for the stadium. In the next step we'll complete the scene, adding an undulating roof using RailClone2's new 2D Array generator.


