Tutoriales
Aprende nuevas habilidades con nuestras lecciones breves
Requerimientos
Forest Lite 3.4, 3DS Max 9 (Vray), 3DS Max 2010 (Mental Ray)
Productos destacados
Obtener Productos
Tutorial
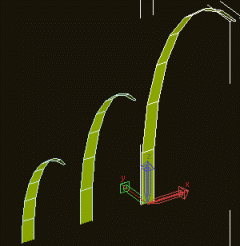
This tutorial shows you how to create realistic grass. We have used Forest Lite and VRay to create it. But if you use Mental Ray, you may also download a ready-to-render scene for Mental from the files section.
One option when using Forest is to scatter single blades of grass over the field area. Although this method works, it is not efficient at filling large surfaces because millions of single items must be created and rendered by VRay. When possible, it is better to create a clump of grass object, and scatter instances of it over the surface using Forest, in order to have only several thousands items in the final scene.
The key of this tutorial, is that we use two nested Forest objects. One to create the clump of grass, and the other to scatter multiple copies of it over the surface. In this way, we can modify both objects parametrically, adjusting the density and distribution of the grass much more easily.
In the Max scene, we have already included some individual blades of grass. They were modeled using a plane with a Bend modifier, and moving some vertices.
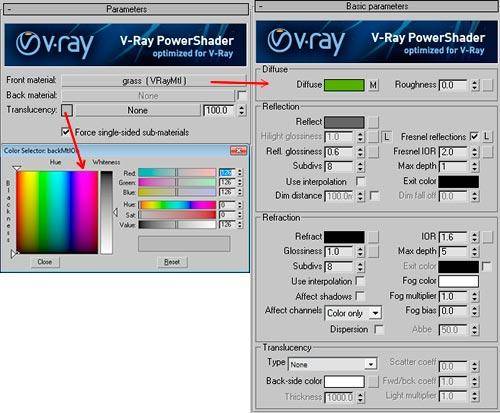
In VRay, to create the translucent effect that we observe in the real vegetation, we use a VRay2SideMtl material for the grass.
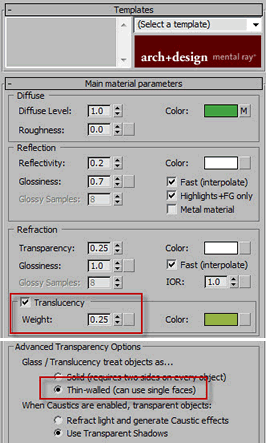
In the Mental Ray scene, a translucent Arch & Design material does the work. Since the grass blades are planar objects, we have to enable the "Thin-walled" checkbox, in the Advanced Rendering options of the material.
The scene is illuminated using a VRaySun light, with a VRayPhysical camera. We place the sun in front of the camera and very low in the sky, to back light the grass and enhance the translucent effect.
Note: We have included in the Max file a finished scene, with all the elements ready to render to get the final image. If you want to complete the walktrough of this tutorial, delete the objects "forest_clump", "forest_grass" and "Circle01" before continuing.
The first stage is to create the clump of grass:
- Open the realgrass_vray1.max (VRay), or realgrass_mentalray1.max (Mental Ray) scene.
- Select the Camera1 view, and create a circle with a radius of 0.25m.
- From the the Creation Panel - "Itoo Software" category, create a Forest object and click the circle.
- Create three items on the Geometry List, and assign the blades as "Custom Objects".
- Set a Distribution Map of type "Dense", X size = 1.8m (Distribution rollout).
- Enable random Rotation on Z axis, 0 to 359 degrees (Transform rollout).
- Set random Height Scale, 80% to 100%. Disable "Lock aspect ratio".
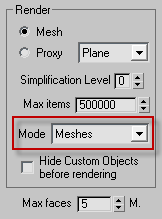
By default, in VRay and Mental Ray, Forest does not create a mesh to render itself, but uses a custom shader that generates native instances for the render engine. This lets us render millions of items, using minimal resources. But to use the Forest clump as a source for other Forest objects, as we want to do on this tutorial, we must disable the VRay shader and generate a standard mesh:
- In the Display rollout, change the "Mode" parameter from "Automatic" to "Meshes"
- Rename this object "forest_clump".
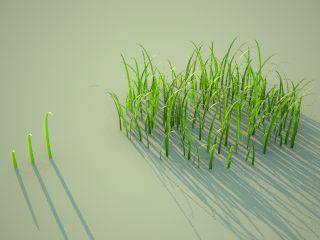
Next, we are going to create the field of grass:
- Add a second Forest object, clicking the "grass_area" spline.
- Assign the "forest_clump" as a Custom Object.
- Set Distribution Map to "Full", X size = 32m.
- To avoid the grid effect created by the Full map, set random Translation to 10%.
- Enable random Rotation on Z axis, 0 to 359 degrees (Transform rollout).
- Set random Height Scale, 150% to 50%. Disable "Lock aspect ratio".
- In the Camera rollout, enable Density Falloff, Range Min 0m, Max 70m. This is optional, we use it to blend the grass boundary with the background in the horizon.
To improve the composition, we have included some flowers in the scene. Unhide the "forest_flowers" object and render to get the final image.
Finally, we suggest you try changing the density parameters of both Forest objects, and the radius of the clump of grass, to get different grass distributions. This technique of nesting parametric objects is useful for other scenes as well.
